In this article, I will be configuring a Worker as a Web Server with Webpack.
This is the second article in a series I am doing on Cloudflare Workers. I am excited about the Cloudflare Workers platform and if you are too, subscribe to my Newsletter and get a notification for the next article!
Cloudflare Workers Course Outline
- Getting Started with Serverless Cloudflare Workers
- Cloudflare Workers as a Web Server (with Webpack)
- Making API Calls From a Cloudflare Worker
- Key-Value Storage With Cloudflare Workers KV
- [Bonus] Smart Routing with Cloudflare Workers
Generate a Cloudflare Worker Website
If you already have wrangler installed, you can skip the npm install step.
$ npm install -g @cloudflare/wrangler
$ wrangler generate my-website
$ cd my-website
Configure Webpack
Webpack supports the webworker target output with this webpack.config.js.
I also move index.js to src/index.js. I like to keep all my source files in an src directory so they aren't hidden by all the configs in the root.
module.exports = {
    target: 'webworker',
    context: __dirname,
    entry: './src/index.js',
    mode: 'development',
    devtool: 'cheap-module-source-map',
    module: {
        rules: [
            {
                test: /\.html$/i,
                loader: 'html-loader',
            },
        ],
    },
}
I am also installing the html-loader to include html files in the bundle.
$ npm install --save-dev html-loader
Change The Worker Type to Webpack
Change the type to webpack and add webpack_config with the value webpack.config.js.
Don't forget to set theaccount_id.
name = "my-website"
type = "webpack"
account_id = "1234567890" # set the account_id here!
workers_dev = true
route = ""
zone_id = ""
webpack_config = "webpack.config.js"
Add HTML Files
Create an html directory and add an index.html and 404.html.
index.html
<!DOCTYPE html>
<html lang="en">
<head>
    <meta charset="UTF-8">
    <meta name="viewport" content="width=device-width, initial-scale=1.0">
    <title>Document</title>
</head>
<body>
    <h1>Hello Worker!</h1>
</body>
</html>
404.html
<!DOCTYPE html>
<html lang="en">
<head>
    <meta charset="UTF-8">
    <meta name="viewport" content="width=device-width, initial-scale=1.0">
    <title>Document</title>
</head>
<body>
    <h1>404 Not Found</h1>
</body>
</html>
Loading Routes
Modify the src/index.js file to import the HTML files and then in handleRequest, return either the index.html or the 404.html.
import index from '../html/index.html'
import notFound from '../html/404.html'

addEventListener('fetch', event => {
  event.respondWith(handleRequest(event.request))
})

/**
 * Respond with hello worker text
 * @param {Request} request
 */
async function handleRequest(request) {
  const { pathname } = new URL(request.url)

  if (pathname === '/') {
    return new Response(index, {
      headers: { 'content-type': 'text/html' },
    })
  }

  return new Response(notFound, {
    headers: { 'content-type': 'text/html' },
    status: 404,
  })
}
At this point let's preview and make sure it's all working.
$ wrangler preview --watch
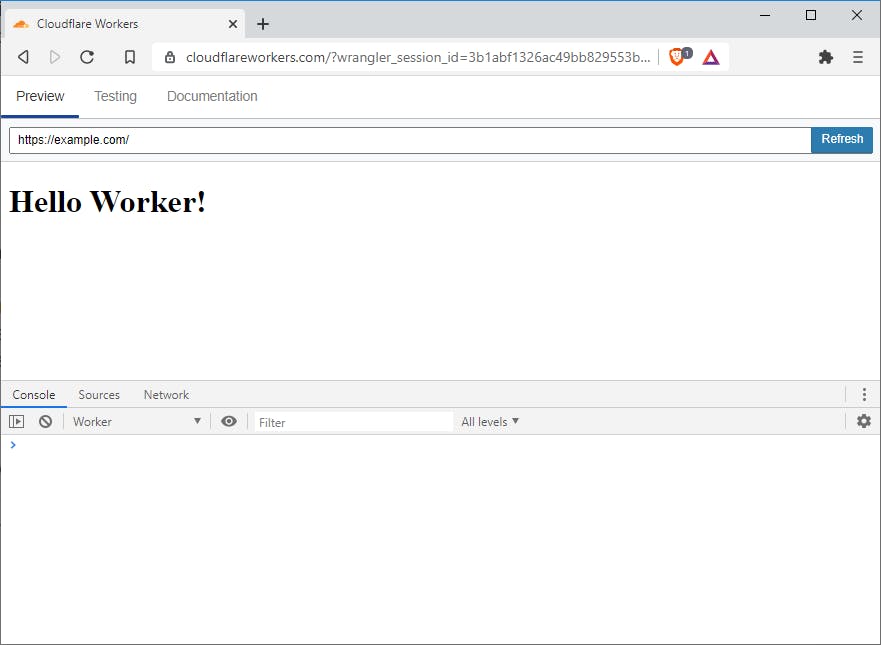
If all goes well, then a window should popup like this one showing our index.html page.

Smarter Routing
Routing with if statements is pretty primitive. I'm gonna improve this.
Copy the router.js from cloudflare / worker-template-router or (2) and paste it into src/lib/router.js.
Switch back to src/index.js and import the Router at the top of the file.
import Router from './lib/router'
Now I can change the routes inside handleRequest.
async function handleRequest(request) {
    const router = new Router()

    router.get(
        '/',
        () =>
            new Response(index, {
                headers: { 'content-type': 'text/html' },
            }),
    )
    router.all(
        () =>
            new Response(notFound, {
                headers: { 'content-type': 'text/html' },
                status: 404,
            }),
    )

    const response = await router.route(request)
    return response
}
It might not seem like a big change, but the route is now checking the path for / and the method for GET. This will give me great flexibility in my planned future.
Refactoring
At this stage the Website is working pretty well, but I always like to do a little bit of refactoring in the end. It just makes me happy.
Responses
First, I'm going to move the responses into a new file.
/**
 * src/lib/responses.js
 */
import notFoundHtml from '../../html/404.html'

export const htmlResponse = html =>
    new Response(html, {
        headers: { 'content-type': 'text/html' },
    })

export const notFoundResponse = () =>
    new Response(notFoundHtml, {
        headers: { 'content-type': 'text/html' },
        status: 404,
    })
Now I can import these from src/index.js
import { htmlResponse, notFoundResponse } from './lib/responses'
Then my handleRequest function cleans up like this.
async function handleRequest(request) {
    const router = new Router()

    router.get('/', () => htmlResponse(index))
    router.all(() => notFoundResponse(notFound))

    const response = await router.route(request)
    return response
}
Pages
I like having the concept of pages, similar to how Next.js works. All my logic can't be written inside of src/index.js and I like to break this out early.
So I'm going to create a pages directory and create my two routes.
/**
 * src/pages/index.js
 */
import { htmlResponse } from '../lib/responses'
import index from '../../html/index.html'

const home = () => htmlResponse(index)

export default home
/**
 * src/pages/404.js
 */
import { notFoundResponse } from '../lib/responses'

const notFound = () => notFoundResponse()

export default notFound
In src/index.js I import the new routes and remove some old imports.
import index from './pages/index'
import notFound from './pages/404'
// import index from '../html/index.html'
// import notFound from '../html/404.html'
// import { htmlResponse, notFoundResponse } from './lib/responses'
Then my handleRequest turns into this. Notice how I am passing the request into each page. It's unused now, but I will eventually have a route that will need it.
async function handleRequest(request) {
    const router = new Router()

    router.get('/', () => index(request))
    router.all(() => notFound(request))

    const response = await router.route(request)
    return response
}
Source Code
Check out the project over on my Github repo.
https://github.com/joelnet/cloudflare-worker-website
Summary
Configuring Cloudflare Workers to work as a web server is pretty simple using the webpack project type.
I was able to import HTML using the html-loader Webpack plugin and serve pages based on custom routing.
Subscribe to my Newsletter to continue learning about Cloudflare Workers!
Cheers 🍻
- Join my 📰 Newsletter
- Subscribe to my 📺 YouTube, JoelCodes
- Say hi to me on Twitter @joelnet

